Starting Seeds — Navigating the Complex Choreography
by Janet Scheren, Fairfax Master Gardener
 Anticipating the spring garden can be overwhelming. You not only have to narrow down the hundreds of possible flowers, herbs, veggies and fruit you might want to grow, but you also must begin the complex choreography of which seeds to start when and which to direct sow outdoors versus which to start indoors and transplant out at a suitable time.
Indoor vs. Direct Sow
Starting seeds indoors gives you an early start. I learned the hard way last year that some crops, like peppers, need a long growing season to reach maturity then produce and ripen fruit. I wound up battling the unseasonably cold September temperatures to eke out a miserly crop of Peppadew peppers even though bushes were loaded with hundreds of green fruits. I finally took all those that had begun to color indoors to ripen in a paper bag. They were good, but not as good as those ripened on the stem. This year, I’m adding these small, sweet and tangy peppers to my list of crops to start indoors. This will give me a big head start when the weather warms up. I had the same issue with my San Marzano tomatoes. Lots of green tomatoes were left on the vines. Other nightshades and warm season plants such as okra also qualify as those plants that need a longer growing season than is dependable in Zone 7.
On the other hand, some plants just don’t transplant well. In this grouping are squash, beans, beets, carrots, peas, many of the root vegetables and such. Carrots are notoriously difficult to germinate and don’t transplant well at all. Flowers that don’t transplant well include nasturtium and sunflowers. Check the seed package to see if your variety is recommended for outdoor sowing or can be started indoors.
Getting the Timing & Conditions Right
Once you know which seeds to start indoors and which to start outdoors, you can chart your timeline. Most seed packets will tell you the ideal germination temperature, light requirements, days to germination and how many weeks are needed before you transplant your seedlings outdoors.
Germination temperatures vary by plant variety
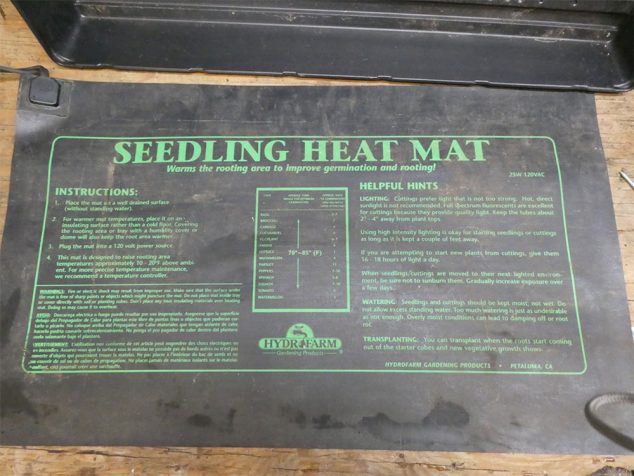
Seeds for warm season flowers and crops require warm soil and air temps to germinate. Tomatoes and other warm season plants benefit from the use of a soil mat — think flat heating pad with just a low setting — to germinate seeds. These plants will germinate outdoors when the soil and air temps have warmed up, but they may not flower and bear fruit until July or later.

Electric heating tray
Because the tough outer coating on many seeds have developed over millennia to protect the precious genetic material contained within, many seeds need special treatment to germinate. Some seeds require stratification, a period of cold that simulates winter. You can imitate this process indoors by placing seeds on a moistened paper towel, sand, peat or vermiculite in a sealed container or plastic bag. Then put the container in the refrigerator between 33 F and 40 F for the designated time. Others require warm stratification, which typically ranges from 68 F to 85 F. Stratification typically takes one to three months, so be sure to add that time to your planting cycle. Seed packets will indicate if stratification is needed. Once you begin stratification, you’ll need to check the seeds periodically for excess moisture to ensure they don’t rot. Once germinated, you’ll plant these sprouts in pots or directly outdoors if conditions are suitable. Purple Coneflower (Echinacea purpurea), False Indigo (Baptisia australis), Black-Eyed Susan (Rudbeckia hirta), Flowering Dogwood (Cornus florida) and Redbud (Cercis canadensis) are among the seeds that need stratification. Other seeds need to be scratched to break the seed coat before they can germinate. This is called scarification. Still others need a good night soak in lukewarm water.
Another factor to consider is lighting. Some seeds require light to germinate and should be left uncovered or lightly pressed into germination medium. Others need darkness and should be pressed one-quarter or one-half inch into the soil. Still others require a thin covering of soil, leaving the seed close to the soil surface.
Once seeds have germinated, you’ll want to wait for the seedlings to mature for a couple of weeks or more before transplanting out. This not only allows for the air and soil to warm up, but it also gives the seedlings time to strengthen. During this period, you’ll want to support their growth by adding a small amount of fish emulsion, liquid kelp or other organic liquid fertilizer to the water.
The Virginia Cooperative Extension has an excellent handout to get a broader perspective on your garden choreography. It’s linked in the resources below. It provides a comprehensive guide to transplant and direct seeding dates for a wide variety of crops and flowers for Virginia hardiness zones. Many seed companies provide planting guides as well.
Pots and Potting Mixture
While you can mix your own seed starting mixture, it’s easier to purchase a sterile potting soil specifically identified for seed starting. There are many options in both garden centers and big box stores. These mixtures contain fine textured soil, so it’s easy for tender seedlings to push through and reach the surface. The potting mixture should be saturated with non-chlorinated water then allowed to drain to remove excess water before being added to pots or seed packs. It’s virtually impossible to ensure there are no dry pockets of soil that will stunt root growth if you try to moisten the soil after it’s already in a pot. Some gardeners top their seedlings with vermiculite or a specialized mix that helps to prevent damping off. Pathogens that cause damping off thrive in cool, wet conditions. Low light, overwatering, high salts from over fertilizing and cool soil temperatures are all associated with increased damping off.
You can use almost anything for pots — from yogurt containers to peat pots to biodegradable bags. If using anything other than a new seed pack or pot, be sure to sterilize the container and any tools. You don’t want to introduce pathogens that will infect your tender seedlings and cause them to damp off . You can do this by running them through your dishwasher or soaking them in a mild solution of bleach but be sure all bleach is well washed away before adding soil and seeds.

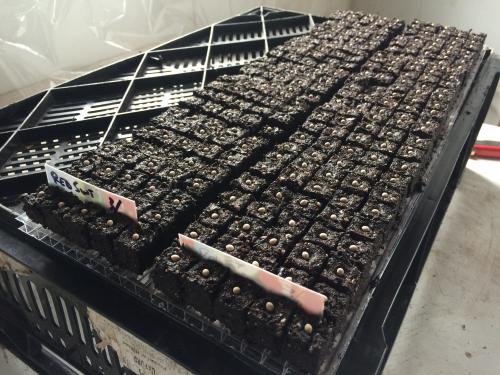
Soil blocks made from stamp tool
Many gardeners are now moving to soil stamping. This process uses a tool much like a cookie press to clump soil together in cubes and set them in a mesh tray without being placed in a pot. This method is even being used by boutique organic farmers to raise sturdier seedings. The equipment leaves an indention on top of the soil cube for the seeds. You place the seed in the depression and sprinkle with additional soil. The major advantages to this method include that the roots self-prune when they grow out of the soil block into the air and begin growing again when the blocks are transplanted to a larger pot or into the garden. This means that the roots won’t become root bound. It also reduces transplant shock because you don’t pull the seedlings out of a seed pack or container when planting out. Peat pots and degradable sacks also limit transplant shock in that way, but you may need to peel back some of the pot or sack to ensure it is fully below the soil surface. Otherwise, the medium can wick moisture from the soil around the seedling and dry it out.

Seedling grow lights
Light Sources
Some gardeners have been successful with growing seedlings in a bright south facing window. On a limited budget, this is worth a try. I have found it difficult to produce robust seedlings without a decent set of grow lights. Fortunately, the prices have dropped considerably in recent years for a quality set of full spectrum LED grow lights that can support two to four trays of seedlings. Recent discoveries indicate that the white full spectrum lights best replicate the full color range of light that plants receive from sunlight. Some grow lights include the nonvisible range of the spectrum from infra-red to ultraviolet, which also benefit plants. If you’re serious about growing several trays of large healthy seedlings, it’s worth $70 to get a good quality grow light. You can easily make that back in one growing season in the difference between the cost of seeds and buying just a few flats of seedlings. Adding an oscillating fan to your grow room not only reduces the risk of fungal disease, but it also strengthens stems to produce more vigorous plants.
Hardening Off
Hardening off is the process of gradually exposing the seedlings to outdoor conditions a few hours a day. This is particularly important in spring when mid-day temperatures are warm but cool in the morning and later afternoon. Whether you grow your own seedlings or buy them, it’s important to gradually expose tender young plants to the elements to help them acclimate.
Resources
Virginia’s Home Garden Vegetable Planting Guide: Recommended Planting Dates and Amounts to Plant, Alex Hessler, 426-331, Virginia Cooperative Extension
Seed Starting Demystified, Pamela T. Hubbard, Monroe County, Penn State Extension
Plant Propagation From Seed, Diane Relf and Elizabeth Ball, Virginia Cooperative Extension
Starting Seeds under Lights, Pat Dickey, Fairfax Master Gardeners,fairfaxgardening.org