Compost
A transformational experience for your garden
By Marsha Goldberg, Fairfax Master Gardener
Ask a seasoned gardener to reveal the key to ensuring a bountiful garden, and their answer may very well be, “Compost!” Compost is the crumbly, nutrient-rich product that results when living matter decays and decomposes. So beneficial is it to plants that compost is often referred to as “gardeners’ gold.”
When you work compost into the soil of a new bed or use it as a top dressing on an existing bed, it can improve the texture or “tilth” of either sandy soil or soil with too much clay. Compost can also correct the pH level of the soil (a measure of its acidity), transforming ordinary garden dirt into an almost-perfect medium for growing most plants. The nutrients that compost contains become available to plants and may eliminate the need for additional fertilizer or other amendments. Another benefit: when you eat vegetables you grow using compost, you also ingest the vitamins and minerals that were in the compost. The process goes full circle when you put the vegetable scraps from your meal right back into your compost pile to begin the cycle anew.

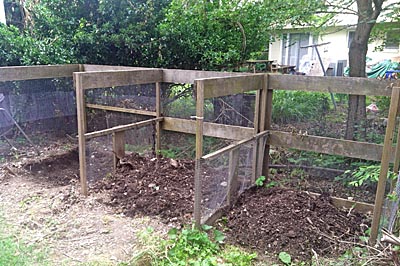
Three bin compost
The amount of work you put into making compost will determine how long it takes for the raw materials to turn into the rich, brown material that your garden craves. If you pile up your lawn clippings in a corner of your yard and do nothing, it will decay in a year or two, depending on factors such as weather. Turning it for aeration will speed the process, as will adding chopped or shredded leaves that you collect in the fall. (Leaves that are not chopped will mat and impede air flow through the pile; small pieces of material will always decay faster than large pieces.) Garden debris such as grass clippings and spent plants that you cut back can supply nitrogen, while leaves and other woody materials supply carbon, so it is good to have a mixture of both. When building your pile, you should try to add about equal amounts of carbon materials and nitrogen materials by volume to your pile. That is, for every bushel of e.g., grass clippings, you can add one bushel of straw or shredded leaves or paper. If there is too much carbon, the pile will be slow to decompose while excess nitrogen can make your compost a bit stinky. If anything, err on the side of adding more carbon materials, as much as two parts carbon to one part nitrogen, to keep it from smelling bad. And, if you notice a smell at any time during the process, go ahead and add more brown ie., carbon materials. You may be confused by information that the ideal carbon-to-nitrogen ration is 25 or 30 parts carbon to one part nitrogen. However, this refers to the materials by weight, not volume, which is more difficult for gardeners to measure.
Kitchen scraps–including fruit and vegetable peelings–eggshells, tea bags, and coffee grounds are all great candidates for the compost pile, but do not use dairy products or meat, as these may contain unwanted bacterial. Fish, which will decompose quickly and attract helpful worms, is okay, but bury it deeply in the pile so as not to attract animals.

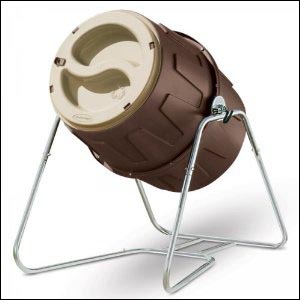
Commercial composter

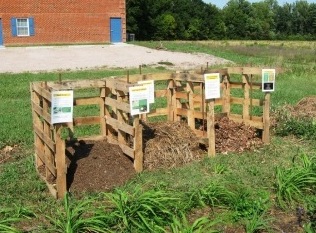
Compost bins made from wood pallets
Remember, the more you turn and aerate a compost pile, the more quickly it will decompose. Wet it each time you turn it to keep it moist but not soggy. The compost is ready to use once you can no longer recognize the raw materials.
You can find more information and many ideas for building bins and making compost online. Try the Virginia Cooperative Extension and the University of Missouri Extension.
Resources
Backyard Composting, Ed Rishell, Master Gardener, Virginia Cooperative Extension
Making Compost From Yard Waste, Ed Rishell, Extension Master Gardener, Virginia Cooperative Extension
How to Build a Compost Bin, University of Missouri Extension
Composting, Diane Relf, Alan McDaniel, Virginia Tech
Compost: What Is It and What’s It To You, Virginia Cooperative Extension