Growing Microgreens
by Diane Keller, Fairfax Master Gardener
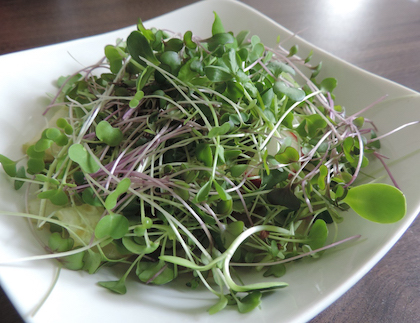
 When you are missing your weekly trips to the Farmers Markets and long for those long, sunny days, it is time to start growing some vegetable greenery indoors. Some of the easiest to grow indoors are Microgreens. These healthy little plants make an ordinary meal look gourmet when topped with their colorful greens. There is an abundance of Microgreens to choose from, and many of the well-known seed catalogues sell quite a variety to choose from.
Microgreens are ”vegetable greens harvested just after the cotyledon leaves have developed with one set of true leaves.” Experts categorize Microgreens into the following plant families:
- Amaranthaceous: Amaranth, Beet and Spinach
- Amaryllidaceae: Garlic, Leek and Onion
- Apiaceous: Carrott, Celery, Dill and Fennel
- Asteraceae: Endive, Lettuce, Chicory and Radicchio
- Brassicaceae: Arugula, Broccoli, Cabbage, Cauliflower and Watercress
- Cucurbitaceae: Cucumber, Melon and Squash
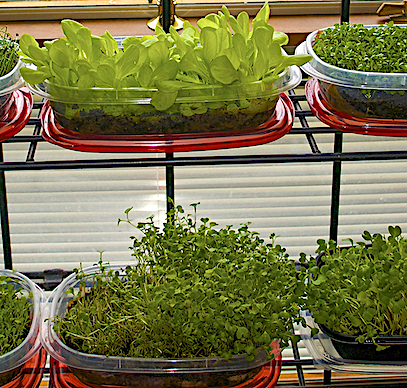
There are a few ways that you can grow microgreens indoors without any elaborate set up or grow light. If you have a sunny window, you can grow microgreens. Fill your favorite pot or container with some good potting soil and plant your seeds. Mist the seeds with water. Cover the seeds with plastic wrap for a couple of days until the seeds sprout, then remove it. The Microgreens will continue to grow for a few weeks, but you will probably use them up quickly because they are so addictive when cooking and preparing your meals.

Hydroponic Microgreens
My favorite method of growing microgreens is hydroponically. Sometimes I do not want to mess with soil after the microgreens are used. Growing hydroponically is simple and easy to clean up. There are several kits available on line to choose from. My choice was a six-inch by two-inch container. Inside the container is a mesh cover that abuts the water level in the container. Pour your Microgreen seeds on this mesh cover. Mist the Microgreens to make sure they are moist. Cover them with plastic wrap for a couple of days until they sprout. Remove the plastic wrap and watch them grow.
One can also use coconut coir and mats composed of natural (cotton, kenaf, hemp) or synthetic fibers (rockwool). No matter what material you use when growing Microgreens, one needs to make sure that the material is suitable for food production and that any pot or growing medium is impeccably clean. Your container should have drainage holes on the bottom so that water does not sit at the bottom of the container and cause fungus to grow or root rot to begin.
One tip when growing microgreens hydroponically and in soil is using Hydrogen Peroxide. When growing hydroponically, I add a couple of drops to the water when I first lay out the seeds on the mesh insert. This addition of the Hydrogen Peroxide helps deter mold and fungus growth on the Microgreens. When growing with soil, put a few drops of Hydrogen Peroxide in your water container when watering. This will increase oxygenation in the soil. Drug stores usually sell 3.0% Hydrogen Peroxide, so the dilution rate would be 32:1 (Hydrogen Peroxide: Water).
Microgreens are also a nutritional benefit for our diets. Research has shown that Microgreens may contain 4 to 40 times more nutrients than mature plant leaves. Many of the nutrients in Microgreens contain antioxidants that help prevent cell damage. Not only are you getting a taste of spring with fresh Microgreens, but you are also eating healthier.
Whatever type of Microgreen you choose to grow or how you choose to grow them, you will benefit not only from getting a taste of spring in the winter months but get a little extra nutrition along with it. The sense of accomplishment you receive after learning how easy Microgreens are to grow is also an extra perk.
- References
- Why You Should Eat Microgreens, Cleveland Clinic
- A Step-by-Step Guide for Growing Microgreens at Home, Francisco DiGiola, Penn State University Extension
- Easy to Grow Microgreens, Meg Norling, Piedmont Master Gardeners