Two Crafty Homemade Plant Labels
By Ray Novitske and Pat Dickey, Fairfax Master Gardeners
 When making your own plant labels for your garden, you will need to determine how long you want your plant markers to last in order to make the right choice on the type of markers. For a short duration of a few months, I have used popsicle sticks or blind slats. I use these to help mark where seeds have been planted before they germinate and grow. The blind slats are vinyl white slats cut about 6 inches long with one end cut to a point. Popsicle sticks are wood, about the same length, and are marked with a marker. I found a half box of tongue depressors at a garage sale that work just as well but are wider to easily write on. Both the wood sticks and the vinyl blind slats are slid into the ground near the plant to be marked.
I can only use these for a few months, because neither will last long. The wood sticks will deteriorate as wood does when exposed to soil and to the environment. Untreated wood also absorbs the writing’s ink so the text can become blurred. This combined with repeated rain washing away the markings will make the text illegible. The vinyl blind slats exposed to ultraviolet light will eventually disintegrate into pieces, and the writing eventually washes off. I have used both of these sticks to locate and label bulbs after planting in the fall, and neither of them survives into spring.
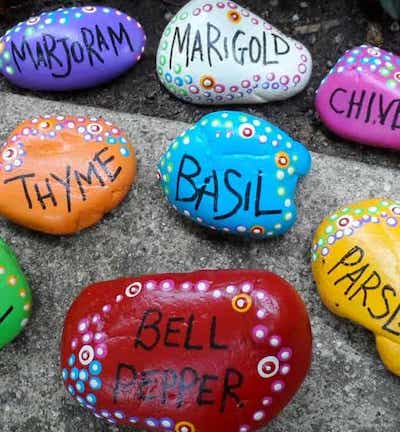
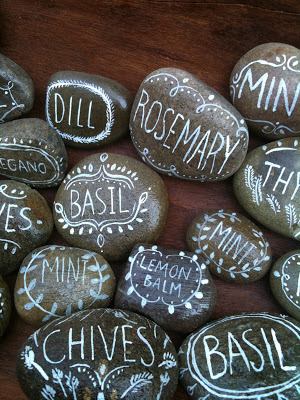
 Now rocks — they are permanent. Homemade painted rock plant markers can be found in a variety of styles and are a crafty way to label your garden. And, they can last longer than a year. Rocks are heavy, so they tend to stay put. And, rocks can easily be moved to new locations along with the plants.
These garden works of art consist of painted text and decoration on small smooth rocks — who doesn’t have any in their garden? Be sure to select rocks that are not perfectly round to prevent them from rolling away. Use a small craft paint brush and patio paint to decorate them. Once you have found your stones and painted them, you will need to coat them with a clear coating to protect the colors from degrading. These particular patio paints can be found and ordered online and are non-toxic. If using another type of paint, be sure that it will not wash off and leech into the soil.

Aluminum garden markers
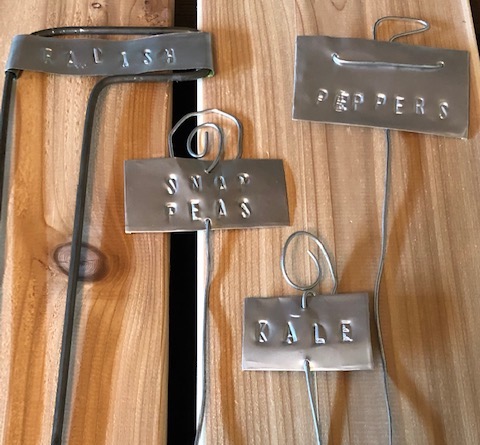
Another type of plant label that will last many years is one made from recycled materials. I discovered that gardeners have made plant markers from aluminum cans, so I thought I would try making them. They won’t rust like many other plant markers that you purchase.
First, save several aluminum soda or water cans to use. Cut the tops and bottoms off of the cans with a tin snip. I used a straight cut tin snip with a serrated edge, and the edges came out smooth. Otherwise they will be sharp and jagged. Be careful! You will then have an aluminum strip to work with.

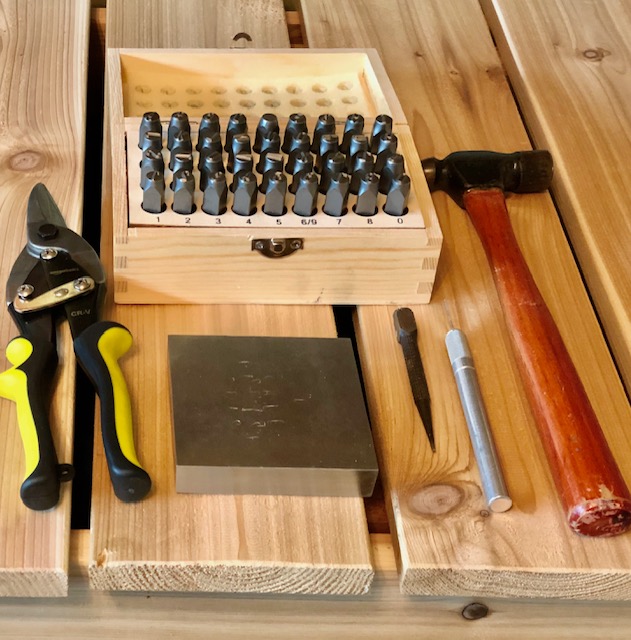
Tools for aluminum markers
Before you begin, place a small steel bench block, or a block of hardwood, on your working surface. Using a ball peen hammer or steel head craft hammer, strike the flat end of the letters to make imprints on the aluminum to spell out your vegetable or flower name. Use a fine-point nail set or awl to make holes in your aluminum to add galvanized wire or pieces of old tomato trellises for the posts. You can be creative with the wire if you want, making decorative shapes on top.
Resources
How To Make Plant Markers and Tags, Vicky Bertagnolli and Dr John Nelson, Clemson Cooperative Extension (You Tube Video)