How to Plant Annuals from the Garden Center
By Pat Dickey, Fairfax Master Gardener
 April and May are exciting times at the local plant nursery, when the annuals are there in all their glory, waiting for someone like you to bring them home for planting. Here are some important steps you need to take to ensure their successful growing season.
Before you learn about how to plant your annuals, it is helpful to know that annuals are given their name because they complete their life cycle in one season, during which they bear seed. They have a bloom span of one season lasting throughout the summer in most cases. There are a few annuals that are more cold hardy, such as pansies and violas, that actually bloom in the fall and rejuvenate early the following spring. However, most annuals are tender and do not like to be planted until all possibilities of frost are past. In Zone 7, this is usually around Mother’s Day. We occasionally have a late frost, so it is important not to rush in planting your annuals. If you purchase them before this time, you may need to protect them in a sheltered warm area or cover them in the evening. Otherwise, they may stop growing from the cold temperatures. Slowly acclimate your annuals to outdoor temperatures if they have been grown in a greenhouse environment.

Pry apart and spread the roots if compacted
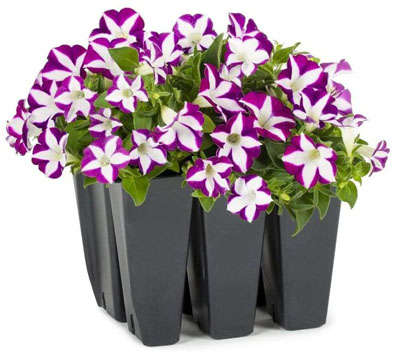
When you are shopping at the nursery, you will notice that annuals come in varying sizes and containers. They are often referred to as bedding plants. They are sold in cell packs or as individual plants. Cell packs are plastic containers with either 3, 4 or 6 pockets per pack and are often sold in units called flats. These are smaller plants and are purchased when many plants are needed for a particular location in your landscape. It may take a few weeks for these flowers to grow and fill the planting bed. Annuals can also be bought as individual plants in either 3, 4 or 6 inch pots. They are more mature than those in the cell packs and are much larger. They can be used where you only need a few plants for small garden spaces or for containers.

Lay out plants before planting into the ground
Before planting your annuals, be sure to prepare the soil where they will be throughout the season. Incorporate organic matter, such as composted leaves or manure, into your soil. Plan to plant your annuals on a cloudy day so that they won’t be stressed by bright sunlight. Before you begin to plant, you may want to plan out the area where they will be ahead of time. Be careful not to plant them too close together. Lay them out on the ground where they will be planted to determine their spacing and how they will look.
Be cautious when removing your annuals from their pots. Never pull annuals from their containers because you may break the stems. Gently squeeze or push up from the bottom of the pot. Then carefully turn the container upside down and tap the edge of it lightly against a firm surface; the plant should fall into your hand. First, loosen the roots and gently break apart the root ball. If the roots were growing upward inside the pot, spread them out and make the roots point outward. Then dig a shallow hole, positioning your plant at the same level or slightly lower than it was grown in its container. Carefully firm the soil around your plant and try to eliminate any air pockets. A starter fertilizer can be applied as directed on the container. Then water well.

Pinching to encourage full bushy growth
Deep infrequent watering is better than light watering. One inch of water per week is sufficient, including rainfall. Water your plants early in the day if possible. If they are watered late in the day, there is more chance of disease. A mulch layer of 2 inches around your plants will help to conserve moisture and minimize weed growth. Mulch can be dry grass clippings, hulls, pine needles, compost or shredded leaves. Refer to the tag with the plant for any other guidelines, especially sun exposure or shade.
Plants respond well to pinching at planting time to remove existing flower buds. This encourages more root growth and more branching, which will eventually increase the number of flowering stems. If your annuals look leggy, pinch the main shoot to encourage the plant to bush out. Petunias will especially benefit from this. Some pruning of your annuals during the summer will keep them compact and stimulate additional blooming.
Your annuals will be stressed at first after being transplanted. Be on the lookout for possible insect problems.
Enjoy your annuals throughout the summer.
Resources
Planting Annuals, Gardening with Annuals, University of Illinois Extension
Annuals, Lana R. Adams, Penn State Extension